Antoin
RMS Regular
Great job Anton!
Cheers Graeme it was a good day to spray them as the coats dried so quick!


Great job Anton!
Would one of these be any good for the initial cleaning and prepping alloys.
Sand/wet blasting set | Kärcher UK
Ive done a set of black mv1 maybe even in this thread somewhere and they are very hard to get all the corners. Well done they look greatView attachment 194040 View attachment 194041 View attachment 194040View attachment 194041
My effort at painting wheels. Left them to my cousin to sandblast them. Learnt my lesson on the last set of wheels I painted that sanding them is a balls.
Epoxy primer in the first pic and base and lacquer in the second. Alloy wheel silver from @Woodcutter in paints and components.
Ive done a set of black mv1 maybe even in this thread somewhere and they are very hard to get all the corners. Well done they look great
Etch is used on bare metal anywhere u sand through the original paint/primer. Espically on alloys as aluminum gets an oxide layer that prevents anything bonding correctly without the use of etchNeed some advice guys. I'm tidying up some 27 year old speedlines. I have then lightly sanded and a bit heavier around the rim as there was a few light kerb marks. A couple of bits are down to the bare metal.
Question is should I use an etch primer on the whole wheel first then filler primer or can I go straight to filler primer, paint then clear coat? I have an etch primer but did read it was only if the whole lot is sanded down to the bone. Cheers
wirebrush any crap off them, I usually douse with alloy cleaner first and give them a good wash. wire brush then sandpaper.
80grit on the rough rash bits, any rash might just be in the paint and not through to the metal. If the metal is damaged you have two choices. 1 sand away and get it looking alright ish, 2 fill with a little isopon.
then sand the whole wheel with 400grit. I usually dont bother with the inside of the wheel bar maybe an inch or so back just to get a bit of paint across.
once the wheels are sanded nice and smooth (but with a little roughness for the paint to adhere to) then make sure they are thouroughly dry! Very important. I use a heatgun to both blow the water out of any nooks and crannies and also to remove any moisture from the surface.
If removing tyres get it done at the start, if not then mask up the tyre. I usually wash with thinners first so the tape will actually stick to the tyre.
Remove any centre badges you dont want painted and mask over the tyre valve.
Now for painting. There are two methods I use depending on how much I want to spend and what colour I want the wheels. Having a heatgun at this point is invaluable.
Silver and cheap: Get 2 cans of autoglym silver wheel paint. Doesnt require primer or laquer and the stuff will pretty much stick to anything. Definately not as fussy as regular paint re reactions etc. Cost is about £10 for the whole job. Usual story, nice smooth coats, do any nooks and crannies first to avoid runs on the main bits. Take your time and go around the wheel giving the paint youve just applied time to dry a little. Use the heatgun to help the paint along after each coat. Leave for a few hours to dry before refitting.
Any other colour or better job: You will need 2 big cans of primer. The yellow filler primer isnt bad as it will leave a smoother finish. A nice light dusting of paint first helps avoid reactions, let this dry for 10 mins or give it a blast with a heatgun. The build up the layers. As before do the crannies first then do the main face last. Heatgun after every coat. Cost is a lot higher around £40-£50 for paint cans depending what kind of effect you go for.

Leave the primer to dry for a couple of hours, makes it a lot easier to sand it without clogging up the sandpaper. Once its dry then sand it with 400-800 grit paper. I use 400 which is maybe a little course but see how you go. I also dry sand as its a pain to dry the wheel every time when wet sanding.
Once the primer is complete give the wheel a wipe down with a cloth to remove any dust still lingering. Now its colour time. Estimate 2 halfords style cans for the 4 wheels.
If doing the wheel 2 colours, ie silver outer and black centre you need to figure out what way is best to mask it off. You apply the first colour then mask off the area you done first and apply the second colour.


If just doing the same colour its a lot easier. As with the primer start with a nice dusting first, give it time to dry then you can go at it properly. Again do the hard bits first. Once happy with the nooks and crannies then give a nice coat over the face of the wheel. The colour should end up looking nice and smooth and as its still wet should look like you want the wheel to end up looking like, nice and shiny and giving a nice reflection of lights. Heatgun again between coats.

Once happy then leave overnight to dry. Very important to reduce reactions in the basecoat and laquer. Usually use around 3 cans of laquer on the set of rims.
Laquer is where DIY refurbs fall down, its not as strong as proper 2pack laquer bodyshops use so you need to get plenty on. Unfortunately the more you put on the greater the chance of a run.
Again start of with a dusting. Let this dry for about an hour. When you come back do the same as before, hard bits first, nice easy coats a few mins apart. You dont want the laquer to dry too much between coats as each coat needs to gel together. Ideally you want a nice smooth reflective finish with the laquer then let it dry for a few days before putting them back on the car. Once touchdry sticking them out in the sun if its bright really helps them dry
You can rub down the laquer later if you want and try to buff it up but I generally tend not to bother.

i use this method and i can paint wheels. thanks


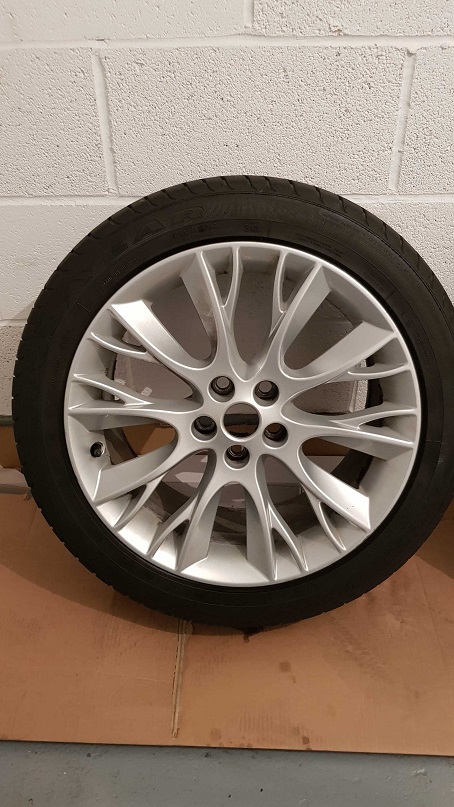
Hi Guys have a set of 18inch which I bought few months ago and its in dire need of refurbishing
So have decided to do them myself as a DIY lesson
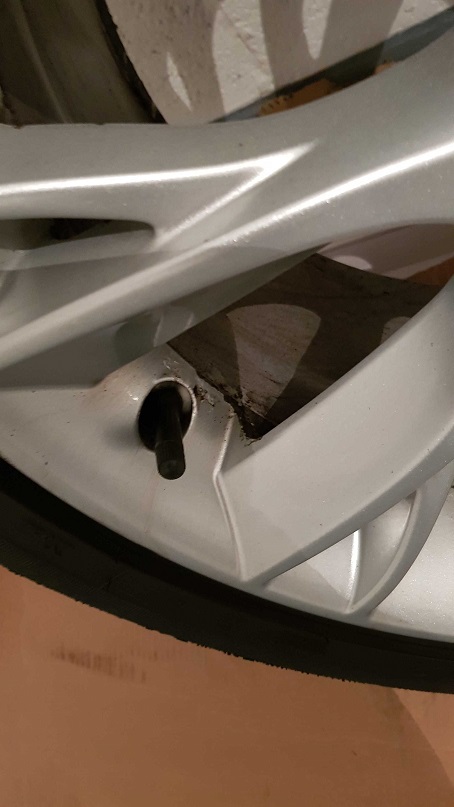
However the wheels are a nightmare to sand them due to design as shown
Questions to ask:
1. What's best way to sand them? i.e. get a sander?
2. Looking at the pictures what grade should I start off with 600,800?
3. Better to do it with tyres off? specially since I want to go with a different colour.
4. What primer to use?
 no sander needed, just paper, and a lot of patience given the design of your wheel
wirebrush any crap off them, I usually douse with alloy cleaner first and give them a good wash. wire brush then sandpaper.
80grit on the rough rash bits, any rash might just be in the paint and not through to the metal. If the metal is damaged you have two choices. 1 sand away and get it looking alright ish, 2 fill with a little isopon.
then sand the whole wheel with 400grit. I usually dont bother with the inside of the wheel bar maybe an inch or so back just to get a bit of paint across.
once the wheels are sanded nice and smooth (but with a little roughness for the paint to adhere to) then make sure they are thouroughly dry! Very important. I use a heatgun to both blow the water out of any nooks and crannies and also to remove any moisture from the surface.
If removing tyres get it done at the start, if not then mask up the tyre. I usually wash with thinners first so the tape will actually stick to the tyre.
Remove any centre badges you dont want painted and mask over the tyre valve.
Now for painting. There are two methods I use depending on how much I want to spend and what colour I want the wheels. Having a heatgun at this point is invaluable.
Silver and cheap: Get 2 cans of autoglym silver wheel paint. Doesnt require primer or laquer and the stuff will pretty much stick to anything. Definately not as fussy as regular paint re reactions etc. Cost is about £10 for the whole job. Usual story, nice smooth coats, do any nooks and crannies first to avoid runs on the main bits. Take your time and go around the wheel giving the paint youve just applied time to dry a little. Use the heatgun to help the paint along after each coat. Leave for a few hours to dry before refitting.
Any other colour or better job: You will need 2 big cans of primer. The yellow filler primer isnt bad as it will leave a smoother finish. A nice light dusting of paint first helps avoid reactions, let this dry for 10 mins or give it a blast with a heatgun. The build up the layers. As before do the crannies first then do the main face last. Heatgun after every coat. Cost is a lot higher around £40-£50 for paint cans depending what kind of effect you go for.
Leave the primer to dry for a couple of hours, makes it a lot easier to sand it without clogging up the sandpaper. Once its dry then sand it with 400-800 grit paper. I use 400 which is maybe a little course but see how you go. I also dry sand as its a pain to dry the wheel every time when wet sanding.
Once the primer is complete give the wheel a wipe down with a cloth to remove any dust still lingering. Now its colour time. Estimate 2 halfords style cans for the 4 wheels.
If doing the wheel 2 colours, ie silver outer and black centre you need to figure out what way is best to mask it off. You apply the first colour then mask off the area you done first and apply the second colour.
If just doing the same colour its a lot easier. As with the primer start with a nice dusting first, give it time to dry then you can go at it properly. Again do the hard bits first. Once happy with the nooks and crannies then give a nice coat over the face of the wheel. The colour should end up looking nice and smooth and as its still wet should look like you want the wheel to end up looking like, nice and shiny and giving a nice reflection of lights. Heatgun again between coats.
Once happy then leave overnight to dry. Very important to reduce reactions in the basecoat and laquer. Usually use around 3 cans of laquer on the set of rims.
Laquer is where DIY refurbs fall down, its not as strong as proper 2pack laquer bodyshops use so you need to get plenty on. Unfortunately the more you put on the greater the chance of a run.
Again start of with a dusting. Let this dry for about an hour. When you come back do the same as before, hard bits first, nice easy coats a few mins apart. You dont want the laquer to dry too much between coats as each coat needs to gel together. Ideally you want a nice smooth reflective finish with the laquer then let it dry for a few days before putting them back on the car. Once touchdry sticking them out in the sun if its bright really helps them dry
You can rub down the laquer later if you want and try to buff it up but I generally tend not to bother.
Cheers man. Best to get the tyres off? However I may just stick to Silver in the end.Do this
i would say so yes, if you can get them off go for it but thats just my opinion. its not necessary thoughCheers man. Best to get the tyres off? However I may just stick to Silver in the end.
i would say so yes, if you can get them off go for it but thats just my opinion. its not necessary though
Oh so right i have already marked it with just picking it up.should have left the tyre on to be fair, much less faffing as the chances of damage when refitting are much higher
Thanks, also painting the inside which will be same as outside do each side need masking etc to prevent over spray's?