The Ultimate X - Fiat X1/9

Mark Bowden

RMS Regular
OP
Mark Bowden
Messages
218
Today was unexpectedly dry down on the south coast so I was able to do a road test.
All the instruments and dash mods worked... except for the change-up lights.
I spent an hour writing an email to the company (SPA Design), including asking them if there was anything I could do in the settings menu, such as select 'remote shift on/off'.
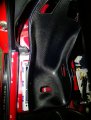
Then I went out again and at some point, noticed that the (hardware) switch I'd added (bottom right of the cluster)... painted matt black and obscured behind my right hand - was in the off position. I switched the remote lights on, and they worked. I can be pretty daft sometimes ! Switch was so discrete it was almost invisible, haha, so I wrote another somewhat apologetic letter asking them to trash the previous one, hoping they won't be wasting any time dealing with a non-existent problem.
During the test I also noticed that it would have been better to have put the tacho on the left and the speedo on the right.
How I got that wrong, is beyond daft but I had assumed the steering wheel would be bang in the centre when actually it's offset to the left !
If I swap the dials round then I will be able to see all of the tacho, and all of the speedo up to 100mph, all the time.
Looks like I will have to take the whole thing apart one more time. Oh well, that's the way it is.
Grrr.
 

svensktoppen

RMS Regular
Messages
32,808
Drives
FK2 CTR
Lol, that's what testing is for, we've all been there. Boring if everything just works, lol. At least it's up and running :cool:
 

michelinman

RMS Regular
Messages
929
Location
Belfast(ish)
Drives
e46
Lol 😀yes those microscopic particles it's very important to collect them!
I use silicone grease, so they stick to it and form a fine paste, which helps create a self-lubricating bearing in effect.
Good idea to get a translation of the documentary by the way... I'd be really interested to hear some of the details.
That D2 Alfa engine is something else eh.
I would not be surprised if it needs to be rebuilt every 50 hours, it's in such a high state of tune - as per the SuperTouring.
What's really fascinating is the amalgamation of 'Gruppo Fiat' to include Lancia and Alfa Romeo.
In fact, if you check the documentary you will see 'Gruppo Fiat - Alfa - Lancia - FIAT' on the engine casting somewhere.
The D2 is a two litre twin cam, single-spark, 8V, aluminium head, iron block engine.
It uses the Lampredi DOHC block as the base, eg same as in many famous cars of the era such as the 037 Lancia or Fiat 131 Abarth Rallye.

Oh, that’s a great idea using silicone! That will last forever! A self lubricating bearing that theoretically can only get better with use, brilliant!!

I’ll definitely get the translation when I’m back at work! We are mostly petrol heads in work, so it will be a short team building session too :grinning:

Twin cam 8v engines are just my favorite. I feel that you don’t have to rev the nuts off them like a 16v and there’s less rotating metal to go wrong lol!

Switch was so discrete it was almost invisible, haha, so I wrote another somewhat apologetic letter asking them to trash the previous one, hoping they won't be wasting any time dealing with a non-existent problem.

.......

Looks like I will have to take the whole thing apart one more time. Oh well, that's the way it is.
Grrr.

One easy fix always has to be paid by a more troublesome one :laughing:

At least you should be faster reassembling the dash on your second go!
 

Mark Bowden

RMS Regular
OP
Mark Bowden
Messages
218
Following a few hours of testing yesterday which included driving at dusk and at night I sent a customer review to SPA, saying -

1. The needles are far too bright. It would be better if they could be turned on or off, better still would be a function in the menu for 'needle brightness' as per the dial backlight.
2. The lack of a separate adjustable backlight for the programming display means that when the dial backlight is low, the programming display is almost unreadable.
3. The patinated glass front lens reduces reflectivity but makes the dial appear blurred.

It might be possible to improve the design by having a dial light which is in the form of a ring, hidden behind the bezel, which shines INTO the dial, through the SIDE - if the dial was made of something like 4mm clear perspex or clear glass with a polished edge.

The dial graphic could then be in the form of a peelable / replacable STICKER on the front of the lens, with the needle behind it, so that only the needle and the numbers are illuminated - the advantages being, the face of the dial could be predominately matt black because the dial itself is indirectly illuminated and acts as diffuser, and there would be no loss of definition.
.......................................................................................................................................................................................................................................................................................................................................................................

Best solutions -

What I've done so far is to build a modified version of the original instrument cluster, as an experiment - call it version 1.
All the modifications worked as planned and I learned a lot along the way.
I'm now going to take the best bits from the original + version 1 and combine them into version 2.

The goal this time is for the end result to look exactly like the original in every way. This means I cannot use the SPA tacho, because the original Veglia tacho winds counterclockwise.

The new engine uses OMEX engine management and a programmable ECU which has the provision to run shift lights. I like the on-dial shift lights in the SPA tacho, so I will fit shift lights into the original Veglia tacho and run them direct from the OMEX ECU.

I noticed that the scaling on the SPA speedo and the Veglia speedo is identical - 20mph is opposite 120mph etc - what an excellent coincidence.
Also the programming display on the SPA aligns exactly with the trip meter cutout on the Veglia dial - woohoo.

I would like to retain the original speedo dial and needle but do away with the mechanism - it's not accurate for the 55 section tyres I'm using, cannot be recalibrated unless I physically change the gearing, it's very noisy, the Bowden cable that drives it is difficult and time consuming to change, and the needle nods.

It looks as though a deeper hack is required, along the lines of - buy another, disassemble it, remove the internals, pull off the needle, black out the dial and bond it to the back of the original dial, chop off the original Veglia dial mounting screws, stick the heads back on to the original dial, push the original Veglia needle back onto the SPA needle spindle a quarter turn clockwise from its original position because the stop pin is at 8 o'clock on the Veglia, 4 o'clock on the SPA, and slice the side off the original odometer barrel to make a fake odometer and not to leave the original odometer window blank - proper geek me.

I wrote to SPA today asking - is it possible for me to order a stepper speedo without a case, needle, bezel, or glass, and with a short (200mm) harness with a female Molex on one end and a male Molex on the other, so that I can remote the I/O sockets and re-house the internals in something like a yogurt pot as a dust cover, once I've attached the Veglia dial ?

Quite possibly this might be the oddest request they've received year-to-date !
DSC_0131.JPG
DSC_0136.JPG
DSC_0137.JPG
 
Last edited:

svensktoppen

RMS Regular
Messages
32,808
Drives
FK2 CTR
You're nuts, in the best possible way :cool: 😁

I bet the good folks at Spa will do something in their spare time for you, just because it's so unusual and a bit of fun for them!
 

Mark Bowden

RMS Regular
OP
Mark Bowden
Messages
218
You're nuts, in the best possible way :cool: 😁

I bet the good folks at Spa will do something in their spare time for you, just because it's so unusual and a bit of fun for them!
Yeah mate I know, lol 😁
Takes one to know one eh...
Like you said earlier, something happens when you really start to bond with a car.
You get used to its foibles and before you know it, you understand very quickly when you do something to it that's wrong.
The view from the office is really important, you're looking directly or indirectly at or over the instruments all the time you're in the car.
The X19 has a tachometer that works backwards - how cool is that?!
 

Mark Bowden

RMS Regular
OP
Mark Bowden
Messages
218
Having become a bit bogged down of late with the instruments, I spent some time on the pedal box.
The pedals in the D-reg are so loose and squeaky I'm positively looking forward to ripping the old box out !
I've read a few horror stories of the sheer impossibility of trying to do much with the box in situ, including people literally cutting holes in the body to extract the bolts (which are 10'' long) securing that damn plastic bush !
It's hard enough even with a good light and a mirror, working out what's what when it's back to front and upside down.
In the end it was easier to get a camera up there and flip the images around on the computer later.
This is the box that's long overdue to be replaced...

DSC_0140.JPG


... yup, she got red carpets.
I bought a complete basket case of a box a few months back, and I've been restoring it in my spare time.
This is what it was like to begin with -

DSC_0085.JPG


I replaced all the parts that I could, and reconditioned those that weren't available or looked reusable...

DSC_0144.JPG


Fixing the chassis to an assembly board made the build a lot easier ...
I had a fight with the return spring on the brake pedal, trying to fit it the wrong way round and using loads of zip-ties to make it conform.
Had to have a bit of a rethink after I nearly skewered my thumb to the chassis !
When the spring is the right way around it's a hell of a lot easier, the assembly board came in to its own during that part of the process.
The spring was still a bit squeaky so I covered it in silicone grease - that shut it up.

DSC_0143.JPG


Other problems included getting the assembly sequence wrong a couple of times, it's a bit of a jigsaw and there are a few captive parts but I got it together on my third attempt.
The only thing left to do is make up three short lengths of brake pipe joining the unions A-A, B-B and C-C.
Job done -

DSC_0154.JPG
 

michelinman

RMS Regular
Messages
929
Location
Belfast(ish)
Drives
e46
@Mark Bowden How's progress on your X1/9 going?

I came across this photo on my data archives and I recall being sent it by Whats App. The guy who sent it to me has a very nice standard X1/9 in Canada and he is also a huge fan. I thought you might be enthused by this photo too :grinning: Looks home built but hard as nails to me!

IMG-20171212-WA0000.jpg
 

Mark Bowden

RMS Regular
OP
Mark Bowden
Messages
218
Hi Michelinman, thanks for asking how the project is going !
Yeah, sorry I know I've not posted for a while.
The main reasons - first I got laid off for a month, waiting for roofing sheets.
Decided to commit to doing the throttle cable, to cut a long story short - ripped out most of the interior, bought a Tillet carbon shell seat and some split sleeving and some insulation material, tried to undo the unions on the pedal box (couldn't), bought a complete set of brake and clutch pipes, got into some hidden corners & found some rust, etch primed and prepped the offside of the car under the carpets, rebuilt the gearshift linkage, fabricated a new centre switch panel having decided to delete the centre console, moved the window switches to that, fabricated a bracket for the satnav (complicated little job)... bought half a dozen front right lower arm balljoints in a panic because they're basically unobtainable, and on and on.
Then the world went crazy so I ended up in self-isolation with the X, in effect, realised that like an idiot I'd splurged all my wages on stuff that would be of no use in an emergency. Spent some of my limited savings on enough basics for 2 weeks, concluded that I'm going to do the engine installation myself, or die, because I can't afford to pay anyone right now and in any case the thought of giving the car to someone else to work on, appals me.
So I've been putting in some crazy hours to the extent I cannot keep up with the documentation and this blog !

Thanks for the pic of what looks like a home-built replica of the Abarth 'prototipo' - all I can say is I'm glad not to have gone down that route !
Frankly, anyone prepared to modify the car to this extent and not copy the Group 5 Dallara, needs their head examining lol.
I say this because I'm more focused on track, fast road, or track day mods than rally, that's my bias.
The thing about the 'prototipo' - it was concieved as a rally car, and it lost out to the Stratos, for obvious reasons.

Will post some more pics idc when I have the time.
 

michelinman

RMS Regular
Messages
929
Location
Belfast(ish)
Drives
e46
Wow, you haven’t been sitting around!! Sorry to hear you got laid off and I hope you don’t get sick!

I also found some unknown rust on my wife’s daily last week and like you, I took some crazy hours to get it sorted. With the result that I’m completely wrecked tonight and fit for only Xbox 😂

I really hope you can find the time to get some pics up and I’m looking forward to seeing the engine install.

Intrigued about the additional interior mods you’ve done!

Aaah, I wondered about those wide arches on that picture I posted. Now that you mention it, it does look a little tarmac spec, but i don’t recall seeing an x1/9 on a stage before...

Stay healthy and take care in the meantime!
 

svensktoppen

RMS Regular
Messages
32,808
Drives
FK2 CTR
Sounds like a nice handy list of work there :innocent:

When things are the way they are in this crazy madness it's impossible to plan or prepare for anything. All anyone can do is go one day at a time and do what makes us happy as much as possible. Not going to end any time soon so settle in for the long ride.

Hope you stay on your feet.
 

Mark Bowden

RMS Regular
OP
Mark Bowden
Messages
218
Sounds like a nice handy list of work there :innocent:

When things are the way they are in this crazy madness it's impossible to plan or prepare for anything. All anyone can do is go one day at a time and do what makes us happy as much as possible. Not going to end any time soon so settle in for the long ride.

Hope you stay on your feet.
Thanks Sven, well said, and ... yes.
I got in touch with Steve Tillett, he was in hospital but responding to emails.
I had a good conversation with him - turns out he's an Elise driver and he developed the B5 / B6 for the Elise / VX220 because just about nothing else will fit.
Turns out the X is similar in some ways to the Elise in terms of floorpan dimensions, seats from the Elise fit the X, not much else does.
I took the plunge and bought a carbon B6 40 with the edges cut off + EB4 brackets so IF I ever get to a track one day, the X won't fail scrutineering on the seat !
A ton of cash however, plus a 26 week waiting list currently, but he put me in touch with a few dealers and I found one in Belgium eventually.
All I have to do is design and mock up a pair of rails to convert the hole spacing of the EB4 brackets to the seat anchor holes in the floor of the X.
Plus lengthen the steering boss, and no doubt some other issues to do with ergonomics - elbow rests, seat belt anchors etc.
Hope you're good.
 

Mark Bowden

RMS Regular
OP
Mark Bowden
Messages
218
OK, time to maybe NOT burn the midnight oil for once...
Time to upload a few pics of some of the jobs plus my whole body aches from all the contortions...
I don't have a ramp so I've been working, crawling into corners on my front, working on my elbows, or upside down, or on my side.
Either I was mad already and didn't notice, but I've been enjoying the challenge.

To recap - I fabricated a bracket on the output shaft of the gearbox to mount the Hall sensor, but couldn't get it to work despite it getting power ...
DSC_0002.JPG

I'd had to make up an extension just using mains cable to connect to the sensor and thought the resistances might be all wrong, or the magnet, or the sensor itself...
DSC_0003.JPG

It's a long run from the dash, down behind the centre console, along the tunnel, through the firewall, around three sides of the engine bay, up, and down again.
There is a small area behind the drivers elbow between the inner and outer middle firewall. A great place to hide shoddy work as I discovered !
I did an initial tidy up and removed a pile of redundant wires, temporarily wired the tach to the electronic ignition, and ran the Hall sensor cable through a temporary 'grommet'. These are the fat grey wires.
This area all needs thoroughly sorting.
The Lumention stuff will all be going, I plan to install the Omex ECU in this area.
You can just about see the dreaded throttle cable as it appears out of the back of the tunnel before going through the firewall. You have to look really closely. It's pea green, boy is that thing buried.
 

Mark Bowden

RMS Regular
OP
Mark Bowden
Messages
218
In the end SPA said to send the speedo, Hall sensor, and magnet back to them for testing.
Right.
Like that's going to be easy !
Had to rip the whole cluster out and undo a lot of work.
Plus I hadn't thought about how to do this when I'd done the install. Oh well.
DSC_0015 2MP.JPG

Added some more features while I had the case open... clearances in there are, er... tight -
DSC_0048 2MP.JPG

Turned out there were some pin issues, worked through their mistakes in the end, fault was a blown capacitor on the control board probably caused by +12V being wired to the wrong pin...
DSC_0064 2MP.JPG

But never mind, I put the shift lights, oil warning, battery warning, to the centre of the cluster where they can always be seen...
DSC_0067 2MP.JPG

In the end I built the cluster so it can be easily removed in future.
I'm not going to say ''the next time''...
DSC_0077 2MP.JPG

OK, recap over and sorry if I've been repeating myself.
Next thing was doing some catalog work on the spares front, sourcing a missing front hub carrier to make up a pair that can be reconditioned as spares...
DSC_0169 2MP.JPG

...ditto rear brake shrouds...
DSC_0171 2MP.JPG

... ditto front lower arm ball joints to add to my collection -
DSC_0174 2MP.JPG

... ditto caliper mounting brackets -
DSC_0177 2MP.JPG

... ditto rear wishbones -
DSC_0161 2MP.JPG

Donkey work ... but with a car this old it's important to keep tabs on the parts that, increasingly are not available, therefore have to be painstakingly rebuilt or reconditioned.
 
Last edited:

Mark Bowden

RMS Regular
OP
Mark Bowden
Messages
218
The throttle cable job.
I spent a while researching how to do this.
Nobody said it was easy.
It took me something like 27 hours in the end, not sure how many of those were caused by the lack of a ramp.
Previously I had sourced an NOS part by the OEM (SILA) because you only want the best and you do not want this part to fail. It's also a huge part of the way these cars drive so I didn't want to skimp by just doing the inner.

New cable -
DSC_0178 2MP.JPG

One of the many reasons the throttle was difficult to control - pedal bar flapping about in a hole where there's meant to be a bush. Honest.
DSC_0181 2MP.JPG

One thing led to another and I ended up ripping out a lot of the interior and chucking away all of the degraded sound proofing and insulation material...
DSC_0193 2MP.JPG

I had to take out the centre console, centre switch panel, electric window switches, handbrake, seat runners,etc.
It was like spaghetti in there -
DSC_0183 2MP.JPG
DSC_0185 2MP.JPG

I began to doubt whether I wanted to have the electric window switches mounted on the tunnel so I began to think about keeping the car driveable with a stripped interior as I got further into the throttle cable job.
After a few hours of various absurd positions, I got both the inner cable and sheath, out -
DSC_0221 2MP.JPG

Now, that's some other reasons the throttle was hard to control - a right proper mess.
The spiral thing is the remains of one of the strands forming the armouring of the inside of the outer sheath.
I was surprised it worked at all.
In fact the throttle had stuck wide open a couple of times, which is a warning.

Using some handy things...
DSC_0205 2MP.JPG

... I made a spring compressor for the front firewall end of the cable...
DSC_0200 2MP.JPG

... so that it could be fitted over the clevis prior to fitting the retaining clips on the collet and pinion...
DSC_0199 2MP.JPG

I had to shorten the collet some, and redo the fine chamfer on the end which prevents it binding on the spring, using my cordless drill and a flat file...
DSC_0213 2MP.JPG

Then I dry-ran the assembly using the clevis I cut off the old cable...
DSC_0218 2MP.JPG
DSC_0219 2MP.JPG
DSC_0220 2MP.JPG

This is the working area in the offside footwell, taken lying on my front with my head between the steering column and the pedal box.
Pedal bar, bushes to the right, left hand end is inserted through a keyhole on the right face of the centre tunnel...
DSC_0226 2MP.JPG

... emerging in the nearside footwell where the pedal bar is fixed by a square nylon bush bolted to the left face of the tunnel.
These are the components on this side.
I used various washers to shim the endfloat on the bar so it operated smoothly - well located both ends but not stiff.
DSC_0222 2MP.JPG

The biggest problem other than seeing into the tunnel to assemble the pinion and collet, was extracting the zip ties.
I could have cut 3 immediately prior to the assembly but didn't want to risk it.
It took a while but I got them out in the end.
Job done -
DSC_0256 2MP.JPG

DSC_0263 2MP.JPG

You can see the top of the mechanism located inside the tunnel.
Works a treat by the way.

Moving back down the tunnel, towards spaghetti junction ...
DSC_0261 2MP.JPG

... is the metal frame normally hidden behind the centre console, which is the main support for the scuttle.
I painted it black and decided to fabricate a new panel for the switches that could mount inside the frame...
DSC_0239 2MP.JPG
DSC_0240 2MP.JPG
DSC_0232 2MP.JPG
DSC_0233 2MP.JPG

This I've etch primed and sprayed satin black, reinstalled, tidied up all the spaghetti, everything works nicely and looks pretty clean, I prefer the window switches like this.

I've also started making a bracket for the satnav to mount on the right hand face of the instrument binnacle.
There's a few compound angles in this area to get the screen in exactly the right plane, plus there's only 1mm clearance between the screen and the door, but it's mostly done and with a bit of luck I'll get that painted and fitted by the end of the weekend.
DSC_0001.JPG
DSC_0002.JPG
DSC_0004.JPG
 
Last edited:

michelinman

RMS Regular
Messages
929
Location
Belfast(ish)
Drives
e46
Holy cr@p dude! That’s a lot of work which will be entirely hidden away! Love the attention to detail and your ingenious ideas! Totally empathise with the aches and pains from being contorted! Thanks for the update and sorry that it kept you up late last night!
 

Mark Bowden

RMS Regular
OP
Mark Bowden
Messages
218
Holy cr@p dude! That’s a lot of work which will be entirely hidden away! Love the attention to detail and your ingenious ideas! Totally empathise with the aches and pains from being contorted! Thanks for the update and sorry that it kept you up late last night!
No worries mate, I needed prompting!
It's nice to keep a record but sometimes you just have to put down the camera and get things done.
What do you drive by the way?
 

Mark Bowden

RMS Regular
OP
Mark Bowden
Messages
218
Well it's all gone to cock ain't it ?
Not sure at the moment of anything much.
Not sure if things 'returning to normal' is even going to be possible, let alone a good idea.
I got a message from the government telling me to stay at home, like everyone else I suppose.
Which means, unless things improve or change drastically, basically it's like a death sentence so now I'm real pissed.
Stay at home, yeah OK.
Run out of money.
Starve slowly... is that what he means ?
The bills piling up.
Council Tax, no way am I paying that. Waste of money.
My bank sent me a bs letter about 'help' but continue to charge me a fiver a day on a £250 overdraft.
Put in an invoice for the labour I'm owed, should keep me going for a bit, maybe a month.
Meanwhile in the US there's a 13 TRILLION dollar bailout happening, or something like that.
Going back to work could be suicide.
We're all in it together.
The 99%.
****.
I live alone.
Might as well get on with the X.
Try not to worry, and take it one day at a time.
Big shout out to anyone who's locked up in their garage, tinkering, stay sane.

Big push on the interior work -

Sound deadening / insulation under the rail areas -

DSC_0005.JPG


...plus thin shims to solid mount the rails to the floor -
DSC_0007.JPG


...machine screws thru the top -
DSC_0016.JPG


... splits and flats inside, then torqued the rails down tight -
DSC_0018.JPG


... mounted the seat on to the rails having worked out the setup on the seat brackets first -
DSC_0031.JPG


DSC_0032.JPG


DSC_0035.JPG


DSC_0041.JPG


... centre console deleted, replaced with modified switch panel, blanked off the holes in the tunnel for the manual choke and electric window switches, short shifter conversion -
DSC_0028.JPG


... jumped in, fired up the electrics - this is the view from the bridge of my nose showing feet on clutch and gas perfectly placed, plus the satnav bracket now finished and installed to the right of the instrument binnacle -
DSC_0026.JPG


... same shot with fill-flash off -
DSC_0027.JPG
 

Attachments

  • DSC_0031.JPG
    DSC_0031.JPG
    421.6 KB · Views: 60

svensktoppen

RMS Regular
Messages
32,808
Drives
FK2 CTR
It's a hell of a time for everyone in this crazy madness going on at the moment. It's like our dear leaders have painted themselves in a corner and can't find a way out.

A lot of rock and hard place as well in fairness.

All we can do is tend our garden, take care of ourselves and those near to us, and hold our breath. Even if everything went back to "normal" tomorrow it will be a long time to recover.

At least you have the car to keep you sane. I'm doing a brain transplant on the Hondus, spent last night trying to get the connectors off, lol 😅 It's the little things that keep us going :innocent:
 

Mark Bowden

RMS Regular
OP
Mark Bowden
Messages
218
It's a hell of a time for everyone in this crazy madness going on at the moment. It's like our dear leaders have painted themselves in a corner and can't find a way out.

A lot of rock and hard place as well in fairness.

All we can do is tend our garden, take care of ourselves and those near to us, and hold our breath. Even if everything went back to "normal" tomorrow it will be a long time to recover.

At least you have the car to keep you sane. I'm doing a brain transplant on the Hondus, spent last night trying to get the connectors off, lol 😅 It's the little things that keep us going :innocent:
I'll have a look at your blog later Sven and see what you're up to!
I'm a bit less on edge today, I got offered a small job that I can do at home 😀
 

Mark Bowden

RMS Regular
OP
Mark Bowden
Messages
218
The Hondus 😁... I guess it was either that or the Lota in terms of names.
I think I remember you saying you did the corner weighting on the car, is this correct?
If so, and let's say for the sake of argument, the corner weights are not equal but you don't want to add any weight or do drastic things such as moving the battery or the fuel tank, then what happens?
All I can think of is you apply the weight differences to the tyre pressures and damper settings to compensate for the weight difference, is this correct?
 

svensktoppen

RMS Regular
Messages
32,808
Drives
FK2 CTR
You adjust "spring preload", or ride height to you and me.

An adjustable anti-roll bar can also be used (anti-roll bars work by varying the effective spring rate side-to-side depending on load). But it's better to disconnect any arb and then adjust the spring preload directly. Takes longer and is a bit of a faff, but result is better.

I don't have any adjustable arb though so don't have that complication!

Corner weighting is really just a more precise way of getting the ride height perfectly level across the car. Especially the "cross weights" diagonally across the car. Measuring ride heights alone can be good enough for a heavier road car, but on cars as light as the Elise the extra precision really pays off. Especially on track. Besides, accurately measuring ride height is very difficult.

Every car will have a built in weight distribution. You can get an idea of that from axle weights in the technical data of the manual. For example, the Hondus 🙃 is about 55/45 back to front, a bit like a Porsche. Side to side it's pretty much 50/50 unladen, but with driver in that changes significantly with a car that light.

That fundamental distribution cannot be improved on other than by moving physical weight (or not having breakfast :innocent: ). So the aim of the corner weighting is to get as close as possible to that distribution, especially the "cross weights" measured diagonally across the car.

Once you achieve that the car will absolutely level given a specific load - with driver and no passenger in my case.

Fuel level can influence things as well. Luckily Colin thought about that on the Lotus and the tank is bang in the middle of the car, so changing fuel levels do not affect the fundamental weight distribution too much.
 

Mark Bowden

RMS Regular
OP
Mark Bowden
Messages
218
You adjust "spring preload", or ride height to you and me.

An adjustable anti-roll bar can also be used (anti-roll bars work by varying the effective spring rate side-to-side depending on load). But it's better to disconnect any arb and then adjust the spring preload directly. Takes longer and is a bit of a faff, but result is better.

I don't have any adjustable arb though so don't have that complication!

Corner weighting is really just a more precise way of getting the ride height perfectly level across the car. Especially the "cross weights" diagonally across the car. Measuring ride heights alone can be good enough for a heavier road car, but on cars as light as the Elise the extra precision really pays off. Especially on track. Besides, accurately measuring ride height is very difficult.

Every car will have a built in weight distribution. You can get an idea of that from axle weights in the technical data of the manual. For example, the Hondus 🙃 is about 55/45 back to front, a bit like a Porsche. Side to side it's pretty much 50/50 unladen, but with driver in that changes significantly with a car that light.

That fundamental distribution cannot be improved on other than by moving physical weight (or not having breakfast :innocent: ). So the aim of the corner weighting is to get as close as possible to that distribution, especially the "cross weights" measured diagonally across the car.

Once you achieve that the car will absolutely level given a specific load - with driver and no passenger in my case.

Fuel level can influence things as well. Luckily Colin thought about that on the Lotus and the tank is bang in the middle of the car, so changing fuel levels do not affect the fundamental weight distribution too much.
Hi Sven, thanks that's good to know and cheers for taking the time to explain.
Makes perfect sense!
 
Top